Visual Systems for Occupational Therapy
Improving participation and constructive use of time for:
Therapeutic Activities, Schedules, Routines, and Classroom Self-Regulation.
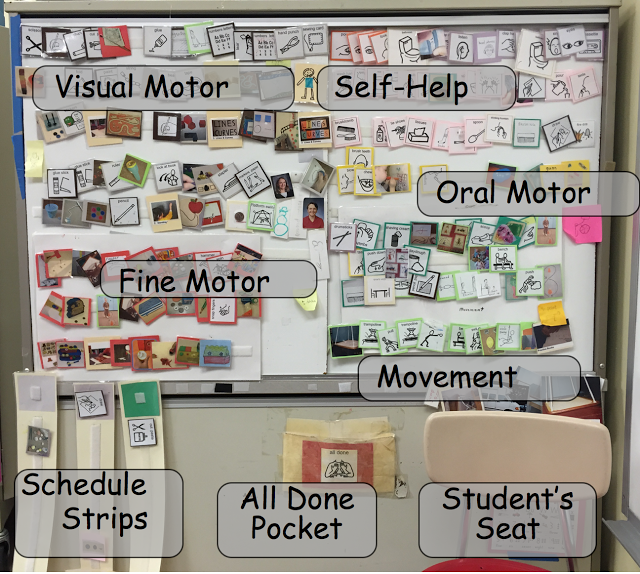
Are you trying to improve the participation and productive use of time with children who may have autism, developmental delays, anxiety or behavior challenges? These children, who typically are not yet fluent readers, can often follow personal picture prompts with greater ease and independence than they can respond to verbal directions or even classroom visuals. This school year I have had a surge of new students who fit those categories!
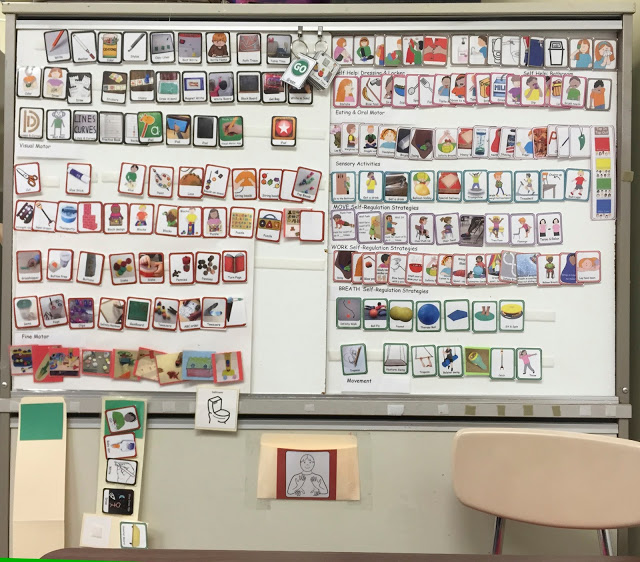
Before: I have a therapy room system that I have been using for a couple decades and it is showing signs of age!
This is how it works:
Task cards are color coded by area of treatment, so that I can easily find the individual treatment tasks I want to use. I sequence the tasks I want to do within one session on a schedule strip, the first one going in the green box. The schedule strip goes on the table, or the mat, or bathroom or wherever we need to be working.
The last double place holder is for the child to pick what they want to do after their work is done i.e., “choice time.
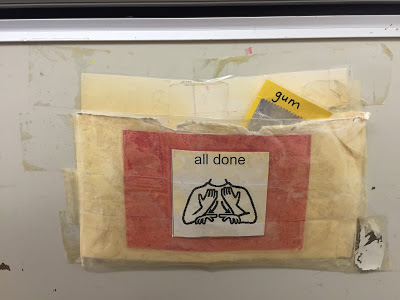
As tasks are done the child turns in their seat to put the card in the all done pocket. You can see how my pocket is way over used! [I am getting grossed out by my current pocket, it might be time to make a new one!]
The next therapy task is put in the green box on the schedule strip.
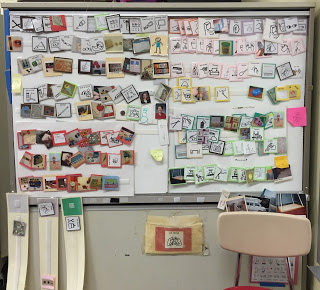
This arrangement, with the child sitting with the picture wall behind them, as they work at the table has been a huge plus for communication.
Kids can easily turn in their seat to ‘ask’ for a therapeutic task they want. If I can blend that into ‘work time’ I can easily add or switch it into the schedule. If using that activity that day does not work for therapy, then I can let that child put the task card into one of the choice boxes.
When we special educators have a new child who needs visual supports we can often feel overwhelmed because visual systems take time and planning to put together, and if not done well or not specific to the needs of this one child, may go unused. If you are a parent who is putting together visual systems for home I can only imagine how daunting this might seem. One thing I would say is, every minute I have spent on building my visual supports has paid off ten fold in what I am able to accomplish with children.
Do-it-Yourself Tips!
This year I have a child who needs visual supports in a school where I did not have a comprehensive system in place, so I am starting over and I took pictures to share the process with you!
I want to start simple and see how a picture schedule works with this student. I have to take new pictures as the pictures I used for the original system were not digital- so are not accessible. [Yes I have used Boardmaker & even though I am moderately tech-savvy, I hate the thought of the time spent looking, making boards the correct size, and still needing to take photos that my kids usually end up relating to and understanding better than line drawings.]
Thus I took digital pictures of the items I want to use with a new OT student at this other school.
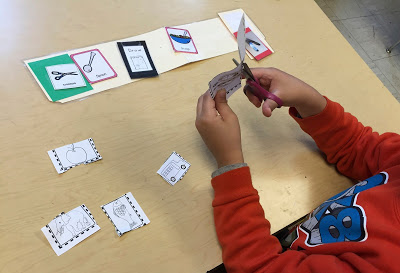
I cut the printed pictures, back them with the color to match my coding system, either laminate or protect with clear packing
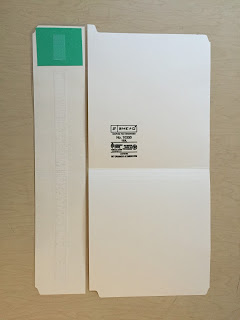
tape and place a dab of sticky back velcro on the back.
I cut off an end of a file folder to make the schedule strip, glued on my green go box, laminated and added velcro.
 This size system portable and is enough to plan a tx session for inside a classroom on the schedule strip and take extras that might be needed in the file folder.
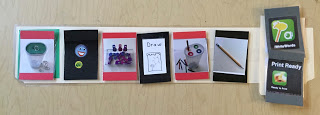
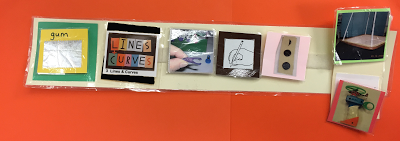
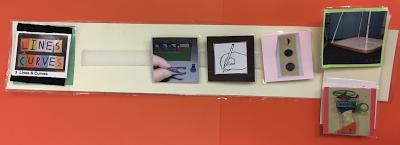
Above is the plan for this child’s first session. Since he had never used a sequenced schedule, with more than 3 visuals that corresponded to the numbers 1 2 3, I had to start with covering up the tasks that were not in the green ‘Go-box’ with my arm. I also placed two visuals on the choice card as he had never been to OT and had no experience with what activities might be available for him to choose. From what I had already known about him I knew that these iPad Apps would be highly desirable.
Making A Visual System That Will Work for Decades to Come.
No surprise, the picture schedule is woking like a charm
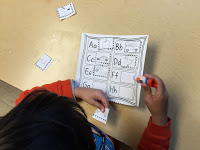
! Trouble is, the child is now magically so compliant and engaged with therapy, he is quickly developing new skills and I need to keep up! At first I robbed a few of the pictures from my home school, but soon decided it was time to use my graphic skills and start from scratch.
This time I wanted to make an itinerant system. I wanted to be able to easily carry my visual system from school to school, into classrooms, and to home service sites. I knew from failed attempts that a visual system for therapy only works if it is large enough. I spent several months taking pictures and purchasing clip art that could describe a more comprehensive set of treatment activities.
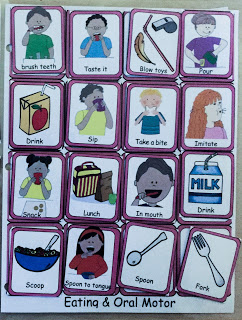
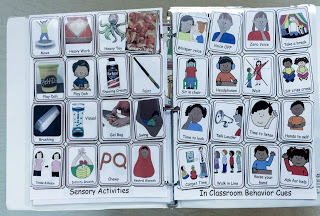
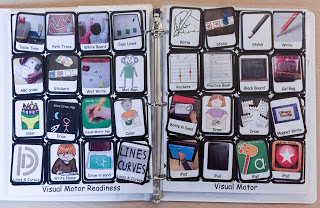
This itinerant system uses individual pages that have blank boxes that are printed back to back, laminated, and velcro is used to anchor task cards.
|
|
The pages are then put into a three ring binder for portability.
I LOVE it!
|
|
A Wall System for Using Visuals in Occupational Therapy
|
Trouble is, when you’ve had a V-8 it is hard to go back to tomato juice! I can no longer face using my old school based wall system; it is just too shabby. So here is a peek at how the new system is shaping up!
|
 |
| Before |
|
Visuals for Inside Classrooms
When using visual supports I almost never have behavior problems with kids inside the therapy room. But what about in classrooms?
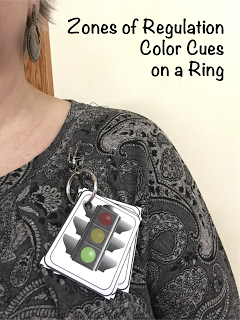
I made two sets of positive visual behavior supports that can be used as flash visual cards or carried on a ring.
|
Color feedback cards can be used alone or in combination with the 16 in Classroom Behavior cues. |
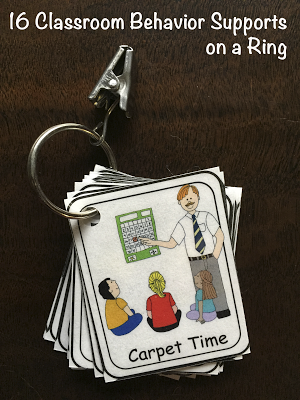 Classroom Behavior cues. |
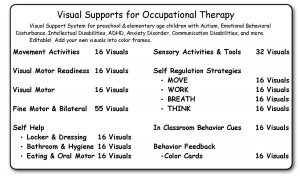
Here is an overview of what is included:
Related Print Path Products:
[inlinkz_linkup id=625043 mode=1]
 As tasks are done the child turns in their seat to put the card in the all done pocket. You can see how my pocket is way over used! [I am getting grossed out by my current pocket, it might be time to make a new one!]
 tape and place a dab of sticky back velcro on the back.
 This size system portable and is enough to plan a tx session for inside a classroom on the schedule strip and take extras that might be needed in the file folder.
 ! Trouble is, the child is now magically so compliant and engaged with therapy, he is quickly developing new skills and I need to keep up! At first I robbed a few of the pictures from my home school, but soon decided it was time to use my graphic skills and start from scratch.










Thanks for your comments Eliza! It is great to know that OTs out there can just stumble upon Capitals First and find it to be useful! I appreciate you letting me know. ~Thia
I just stumbled onto this site and I am taken back by the time, care, and effort you have shared. Thank you, I will be using your site from now on for my pre-school aged clients!
Great post! I love all these ideas. I completely agree that sometimes the time it take to create a visual support/system can be long, but it DOES pay off! I have a 2 and 4 year old and morning time was a difficult time for us (getting dressed and out the door by 7:00). So, I created a visual morning schedule and it has saved us so much time!!
Laura
http://www.discoveringhiddenpotential.com
Loads of great ideas.
Thanks for sharing your system–I admire your organization!